XBMC / Kodi: List files not found in library

One of the biggest hurdles for people setting up their first XBMC/Kodi machines is getting content to scan correctly.

Although the scanner supports a number of different naming conventions, there's still no built-in way of checking which files have been ignored by the library scanner.

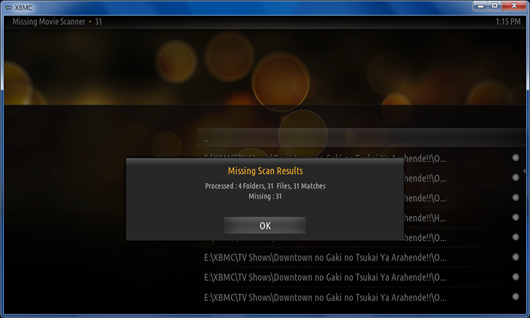
That's why "null_pointer" created "Missing Movie Scanner". It checks your library and finds any movie files which have been ignored by the library, so you know which ones to rename properly.
image

Installation

  • Load up XBMC
  • Settings
  • Add-ons
  • Get Add-ons
  • XBMC.org Add-ons
  • Video Add-ons
  • Scroll down to "Missing Movie Scanner"
  • Select install
  • Go back to the home menu
  • Access Add-ons from your home menu (you may need to enable this, depending on your skin)
  • Select "Video Add-ons"
  • Missing Movie Scanner
  • Now you can select between movies or TV shows
  • The next screen will list the files which aren't included in your library.

anigif_enhanced-buzz-14424-1386607752-4
No, sadly this won't fix any high-5 misses

Source

Python: Visualise your class hierarchy in UML

Sometimes it's handy to graph out the way your classes are arranged, either for training purposes or simply to help you plan your next move.

There's always the option of doing it manually, or you can use some handy tools to do so.

To get the ball rolling, grab pylint and graphviz

sudo apt-get install graphviz libgraphviz-dev python-dev
pip install pylint pygraphviz

If you don't have python-dev installed, you'll run into the error below:

pygraphviz/graphviz_wrap.c:124:20: fatal error: Python.h: No such file or directory
#include <Python.h>

Now back in your project folder, type:

pyreverse -my -A -o png -p test **/classes.py

Replace "classes.py" with "**.py" if you want all python files.

Another example is if you wanted to graph all the form classes:

pyreverse -my -A -o png -p test **/forms.py

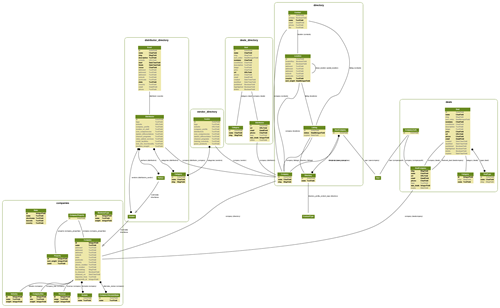
Once it's done, you'll now have classes_test.png and packages_test.png in the folder. The packages image allows you to determine if your code modules are properly decoupled. The classes files shows you how twisted your class inheritance may be.

classes_test

Django models

For Django specific projects, you can install a module called "django_extensions". It also uses graphviz to generate some cool charts but is very Django friendly so you don't have to manually remove Meta classes from your models.

The syntax for graphing models is:

python manage.py graph_models -g -e -l dot -o my_project.png module_a module_b module_c
  • -g groups the models into their respective apps for easier viewing
  • -e shows the inheritance arrows
  • -l uses the "dot" rendering layout by GraphViz (possible values are: twopi, gvcolor, wc, ccomps, tred, sccmap, fdp, circo, neato, acyclic, nop, gvpr, dot, sfdp. I found dot to be the only legible one, and most of them didn't work for me)
  • "-o my_project.png" is the output file
  • module_x includes all the modules which you want to draw

directory_listing

Nintendo 3DS: Transferring your emuNAND to another SD card

Sometimes you need to bump up the size of your SD card to get a game like Super Smash Bros Demo to work. I got a download code from Club Nintendo but it kept freezing on a black screen when I tried to run it!

People eventually figured out you need an SD card 4gb or larger in order to run it. I was only using the 2gb one given with the 3DS so what the hell, time to find a spare SD card laying around the house.

Just copying the files directly from one SD card to another won't work. Fortunately, some smart cookie developed "emuNAND Tool" that does all the hard work for you.

  • Have a working emuNAND as the source SD card.
  • Create an extra emuNAND on the target SD card (see "Creating your EmuNAND" section of a previous tutorial)
  • While your 3DS is creating an emuNAND, grab "emuNAND Tool v1.0.1".
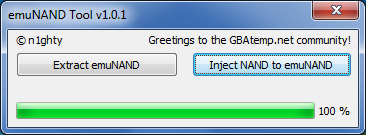
  • Open "emuNAND Tool" and click "Extract emuNAND" to extract the emuNAND from the source SD card to a file (it doesn't take that long, probably a minute or two at most)

emuNAND tool

  • By the time your target SD card is done creating a new emuNAND, take it out of your 3DS and put it into your computer.
  • Click "Inject NAND to emuNAND" and select the file you saved from the source SD card earlier.
  • It will now copy the emuNAND files across to the target SD card.
  • Once it's done, you've now got a replica of your previous emuNAND.
  • Put it back into the 3DS and use it as you normally would.

Note: Games downloaded from the eShop won't be copied. You'll have to re-download those.

nyanimefest08_42
Time to brawl!

Sources

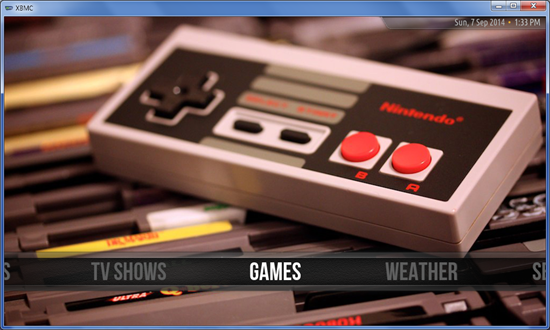
XBMC / Kodi: (Amber Skin) Adding a custom menu item to the main menu

Changing skins isn't easy, but I was getting a bit annoyed at Aeon Nox and the excessive CPU usage when idling in menus. Eventually I went with Amber, a super light weight skin with some pretty good customisation.

For this example, I'll show you how to add Steam games and a custom playlist to your main menu. I used the Steam Launcher addon by Teeedubb, so you'll need that first (or whatever addon you're using).

To begin make sure you have Amber skin installed, along with any addons you wish to add to the main menu.

  • Settings
  • Home Menu
  • Enable "Add-ons"

image

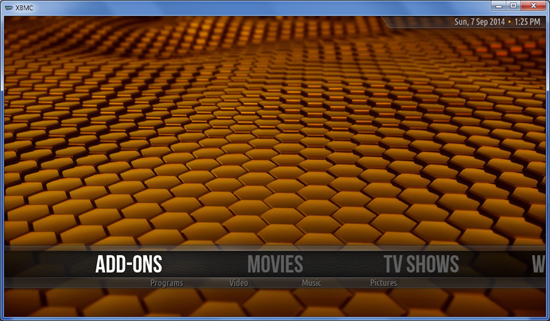
  • Go back to the main menu
  • Select "Add-ons"

image

  • Select Programs
  • Select Steam
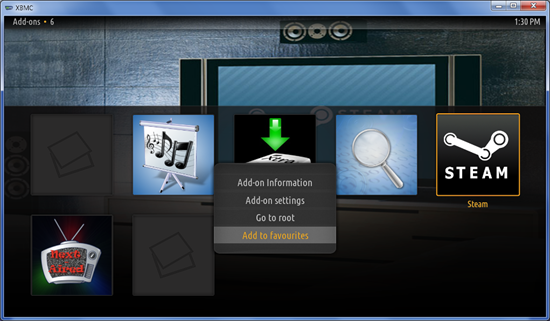
  • Press "C" on the keyboard to bring up the context menu
  • Select "Add to favourites"

image

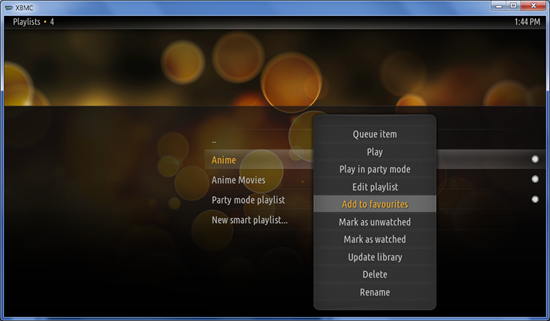
  • Likewise with the custom playlist, I'm going to add "Anime" to the main menu.
  • Go to TV Shows > Playlists (submenu) > Highlight your playlist of choice and press "C"
  • Select "Add to favourites"

image

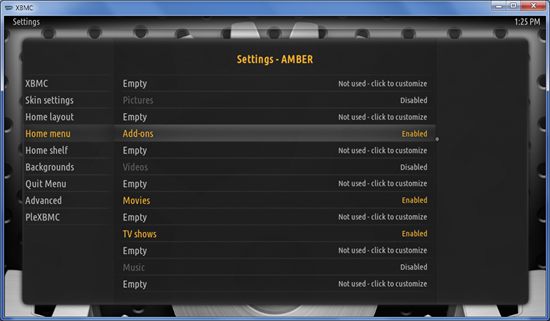
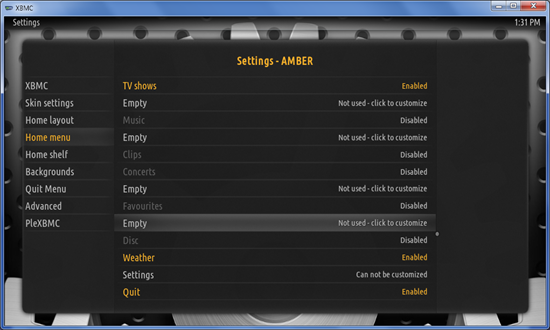
  • Now go back to Settings
  • Home menu
  • And pick an empty slot where you want to put your new custom menu

image

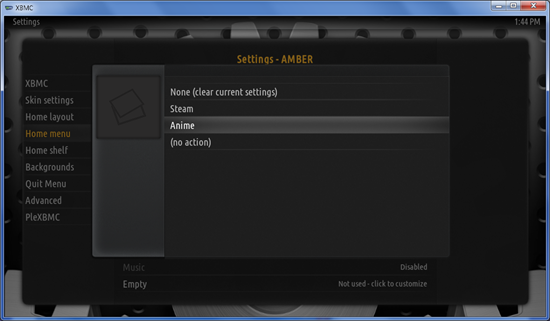
  • Select it
  • Pick Steam
  • Call it "Games"
  • Your menu item should now appear as "Games", but activate the "Steam" addon!
  • Do the same with your custom playlist

image

  • Before moving on, be sure to hide the Add-ons menu if you don't need it anymore.
  • Go to Settings > Backgrounds to customise the background for your new Games menu item
  • And there you have it! You've now got custom menus working on your XBMC menu.

image

Source

Honda Jazz/Civic: Fix for auto-down or auto-up on driver power windows not working

It was a bit strange but after the battery was replaced on my car, the auto-down on the window no longer worked. Luckily it's a known quirk and it's an easy fix.

You just need to reset the window control unit by:

  • Winding it down all the way
  • Winding it all the way back up
  • When it reaches the top, keep holding up for another 3 seconds.

The window should now have auto-up/auto-down enabled again.

6-bizarre-car-Exhausts
Now go forth and fix the other problems with your car!

Sources

Sony Xperia Z1 Compact (D5503): Stock Firmware / ROM Flashing Guide

Every time I buy a phone, it's because I want the phone and the software that comes with the phone... WITHOUT the pre-bundled carrier rubbish. I simply just don't trust carriers tinkering with software and adding bugs. Plus it's always better to get it from the manufacturer because you can get updates right away.

The process is sometimes referred to as "debranding", but quite simply all you're doing is flashing the stock firmware back onto the phone.

Sometimes it's easy to get rid of, other times it's not. Fortunately for us, the guys who made Flashtool has made our lives VERY easy (compared to the loops I had to jump through with Samsung Galaxy phones...)

image
Boot animations of the bastardised branded phone vs the stock firmware (before/after)

What you'll need

What you should NOT use is Sony's "Flash tool for Xperia™ devices". It requires registration and well...

Fo-Dat[1]

  • Flashtool - Xperia device flashing is what you want. The speeds were slow, so I got mine from here. It's a big download (176mb) at slow speeds so leave this downloading while you set up the rest. At time of writing, I used v0.9.18.1.
  • You'll need at least 4.3gb of FREE space for the process. (mine took 4.11gb)
  • It's useful to know the region ID and carrier branding for your device before-hand. This isn't necessary, but helpful when deciding which firmware to download (carrier specific vs generic without branding). You can find more information about regions on this page.

In my case, for Australia you have Generic (1281-3422) vs Telstra (1281-1039). The Telstra one is the branded one that came with my phone, so I will choose the generic one to remove all the extra crud.

Setup

  • Run the "flashtool-0.9.18.1-windows.exe" installer
  • Install it to C:\Flashtool\ (or any folder of your choice, but my instructions will assume this)
  • Go to that folder and run flashtool.exe (or flashtool64 if you're on a 64bit o/s)
  • Let the program update itself with the latest settings from online

Getting the stock firmware

  • Click on the Devices menu > Check updates
  • Double click the phone model "D550X Sony Xperia Z1 Compact"
  • Double click your region to check for the latest version (v14.4.A.108 at time of writing)

The wording may be a little confusing, but "(1281-3422 Customized AU)" is the stock firmware, also known as generic Australian firmware without carrier branding.

  • Right click > Download > Wait. Best tool ever!
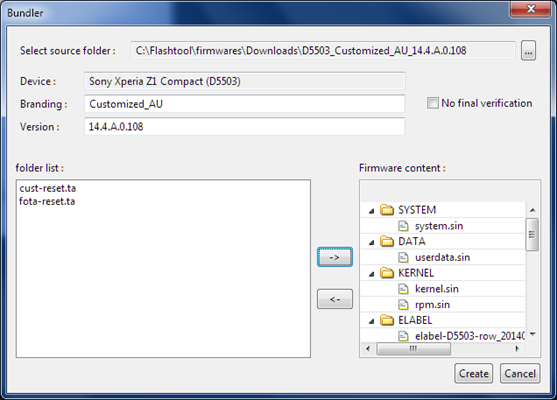
  • When the "Bundler" window appears, select everything EXCEPT for the .ta files (should be cust-reset.ta and fota-reset.ta, and maybe simlock.ta)
  • Click the right arrow button
  • Click Create and wait.
  • When it's done, you'll have your TFT file!

image

Flashing the stock firmware

  • Turn off your phone
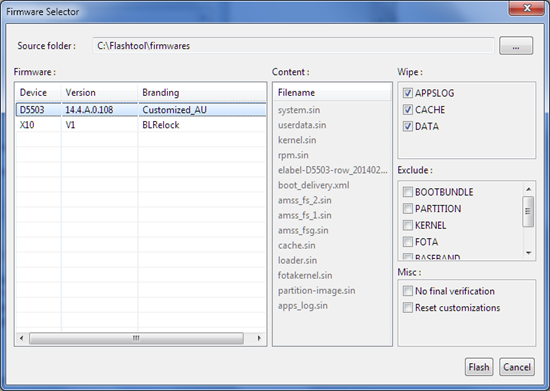
  • Click on the flash icon in Flashtool
  • Select flashmode
  • Select your firmware from before (14.4.A.108 Customized_AU)
  • Hold the VOLUME DOWN and plug in the phone to get into flash mode
  • Should be a green LED light on the phone (briefly)
  • Check the status logs to see that it connected in flash mode properly
  • Click Flash (If you wait or take too long, the phone just boots up normally and you'll have to restart the process)

image

  • Now just wait a few minutes until it finishes flashing.
  • Unplug
  • Turn on phone
  • Enjoy your new firmware!

If needed, here's my guide on how to root a Sony Xperia Z1 Compact (D5503) and unlocking your Sony Xperia Z1 Compact (D5503) bootloader.

Sources

Sony Xperia Z1 Compact: Unlocking the Bootloader

If needed, the Flashtool package has the capability to unlock your bootloader. Be warned, this process will modify the part of your phone which holds the DRM keys to Sony's Xperia services and you will lose access to them. It is best to first back it up as the keys are unique to your phone.

Here's a link to my guide to backing up your Sony Xperia DRM keys.

Once you've got Flashtool:

  • Install and run it.
  • Turn off the phone
  • Unplug it from the computer
  • Click on the "BLU" icon in flashtool
  • Hold the VOLUME DOWN button and plug in the phone to get into flash mode
  • The indicator LED should be green
  • Let flashtool detect and do it's thing
  • Unplug the phone
  • Hold the VOLUME UP button and plug in the phone to get into fastboot mode
  • Indiciator LED should now be blue
  • Follow the instructions in the "Bootloader unlock wizard"

Sony Xperia Z1 Compact (D5503): Backing up your DRM keys

Before you unlock the bootloader or flash your phone with any custom software, be sure to back up your unique DRM keys. The primary reason for this is to be able to maintain your warranty and use of official Sony service apps (if you ever needed it for any reason).

Unlocking the bootloader the official way should keep the DRM keys intact though.

Downloads

Setup

Computer

  • Make sure your computer detects your phone with the correct drivers. Test by plugging it in.
  • Grab a copy of Backup TA (click on the "source code (zip)" link)
  • Extract somewhere for use.

Phone

Process

It's a pretty easy process, but again I remind you that it requires root access.

  • Plug in the phone
  • Run Backup-TA.bat
  • Press any key
  • Look at phone and grant root permission
  • Look back at the computer and pick "Backup" by pressing "1" then "Y"
  • It should take a second or two and be successful
  • Press any key
  • Press 5 to quit
  • Press any key to close
  • Your data should now be saved in "backup\TA-backup-<DATE.TIME>.zip".
  • Move it somewhere for safe keeping!
  • That's it. Now just unplug the phone just to be sure it's disconnected from the script.

6x8y2tt3rgj0luxraaffzl1hr

Now you can go nuts with the customisation!

Sources:

How to root a Sony Xperia Z1 Compact (D5503)

I love these simple root solutions because it simply saves you time and heartache.

Downloads

The software you need is pretty well named. Go to this page and download "Easy Root Tool for various Xperia devices" (EasyRootTool v12.1.zip at time of writing)

Setting up

Plug your phone into the computer and make sure it detects properly. If needed, install the drivers (look at the screen on the phone) so the computer knows what device is connected.

Once that's all working, unplug the phone from your computer.

On the phone, activate "USB Debug Mode" from the Developer Options menu (To activate dev mode, go to Settings > About Phone > tap build number a few times)

Also on the phone, enable "Unknown sources" from the Security menu.

Unzip the contents of "EasyRootTool v12.1.zip".

Rooting

  • Run "install.bat"
  • Plug in phone
  • Look at the phone and confirm the "RSA key from computer" by ticking "Always allow from this computer" and pressing OK
  • Let the script do it's thing
  • Once it says "cleaning up", it's done. (I waited for a while there...)
  • Open the Play Store and download SuperSU by Chainfire
  • Run it and install it in normal mode (unless you know what you're doing)
  • Reboot when prompted
  • Enjoy, and consider donating to zxz0O0 on the XDA forums for all his hard work!


vbLML

High-5's all round!

Source

 
Copyright © Twig's Tech Tips
Theme by BloggerThemes & TopWPThemes Sponsored by iBlogtoBlog